
Kohler Shower Valve Installation Manual: A Comprehensive Guide
This manual details servicing Kohler Rite-Temp valves (K-304) using parts GP77759 & GP500520, or kit GP76851․ Always prioritize safety by shutting off the water supply before beginning any repairs or installations․
Understanding Kohler Shower Valves
Kohler shower valves, particularly the Rite-Temp series, are renowned for their precision temperature control and consistent water pressure․ These valves utilize a pressure balancing system to deliver a safe and comfortable showering experience, preventing scalding or sudden temperature fluctuations․ Understanding the core mechanics is crucial for successful installation and repair․
Kohler’s legacy, dating back to 1873, reflects a commitment to innovation and quality in plumbing fixtures․ The valves are designed with accessibility in mind, allowing for relatively straightforward trim removal, often secured with screws and sometimes silicone sealant․ Proper identification of valve components – like the mixer cap (GP77759) and pressure balancing unit (GP500520) – is essential before commencing any work․ Referencing guides like NU-030 and K-7507 can further enhance comprehension․
Kohler Rite-Temp Valves: An Overview
Kohler Rite-Temp valves represent a significant advancement in shower technology, offering precise and reliable temperature control․ These valves are designed to maintain a consistent water temperature, even with fluctuations in household water pressure․ The K-304 model is a popular choice, frequently serviced with components like the mixer cap (GP77759) and pressure balancing unit (GP500520), or the combined kit (GP76851)․
A key feature is the pressure balancing system, ensuring a safe showering experience․ Installation typically involves positioning the valve between 48-52 inches from the floor, with transfer valves slightly lower (42-48 inches)․ Kohler’s long-standing history, since 1873, underscores their dedication to durable and user-friendly plumbing solutions․ For detailed guidance, consult resources like NU-030․
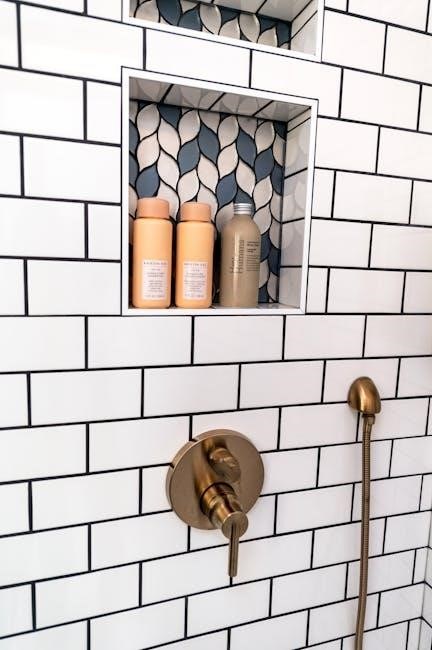
Valve Components: Identifying Key Parts (GP77759, GP500520, GP76851)
Understanding the components is crucial for successful Kohler Rite-Temp valve maintenance․ GP77759 designates the mixer cap, responsible for blending hot and cold water to achieve the desired temperature․ GP500520 is the pressure balancing unit (PBU), vital for maintaining consistent water temperature despite pressure changes․ The GP76851 kit conveniently combines both the mixer cap and PBU into a single replacement package․
During servicing, identifying these parts is the first step․ Removing existing trim often reveals these components․ Be prepared for potential silicone sealant around the trim plate, requiring a razor blade for careful removal․ Proper replacement ensures optimal valve performance and a safe, comfortable showering experience, upholding Kohler’s legacy since 1873․
Safety First: Shutting Off the Water Supply
Prioritizing safety is paramount before commencing any Kohler shower valve repair or installation․ Always shut off the water supply to prevent flooding and potential damage․ Locate the shut-off valves, typically found near the shower or in the basement/utility room․ Turn these valves clockwise until fully closed․
Verify the water is completely off by briefly turning on the shower valve․ If water continues to flow, re-check the shut-off valves or consult a plumber․ Ignoring this crucial step can lead to significant water damage and compromise your safety․ Kohler, since its founding in 1873, emphasizes quality and safety in all its products and installations․
Tools Required for Installation & Repair
Successful Kohler shower valve maintenance requires a few essential tools․ Essential tools include screwdrivers (Phillips and flathead), an adjustable wrench, pliers, a razor blade (for silicone removal), and potentially a basin wrench for tight spaces․ A pipe wrench might be needed for stubborn connections․
Optional, yet helpful tools are a valve seat wrench, penetrating oil (for corroded parts), plumber’s tape, and a small bucket to catch drips․ Having these on hand streamlines the process․ Remember Kohler’s legacy, dating back to 1873, is built on durable products, but even those require occasional maintenance with the right tools․
Essential Tools List
For a smooth Kohler shower valve repair, gather these core tools first․ You’ll absolutely need a Phillips head screwdriver for removing screws securing the trim and valve components․ A flathead screwdriver assists with prying and delicate adjustments; An adjustable wrench is crucial for loosening and tightening nuts on the valve body and connections․
Pliers are vital for gripping and maneuvering parts․ A sharp razor blade is essential for carefully slicing through any existing silicone sealant․ Finally, a basin wrench proves invaluable when accessing hard-to-reach nuts behind the valve․ These tools, combined with Kohler’s quality, ensure a reliable fix․
Optional but Helpful Tools
While not strictly required, several tools can significantly ease your Kohler shower valve installation or repair․ A penetrating oil, like WD-40, can help loosen stubborn, corroded screws and connections․ A small mirror and flashlight are useful for inspecting tight spaces behind the valve․
A valve socket set provides a secure grip on valve components, preventing damage․ Teflon tape ensures watertight seals on threaded connections․ A rubber mallet can gently persuade parts into place without causing harm․ Finally, a stud finder can locate wall studs for secure mounting of the valve․ These additions enhance efficiency and precision․
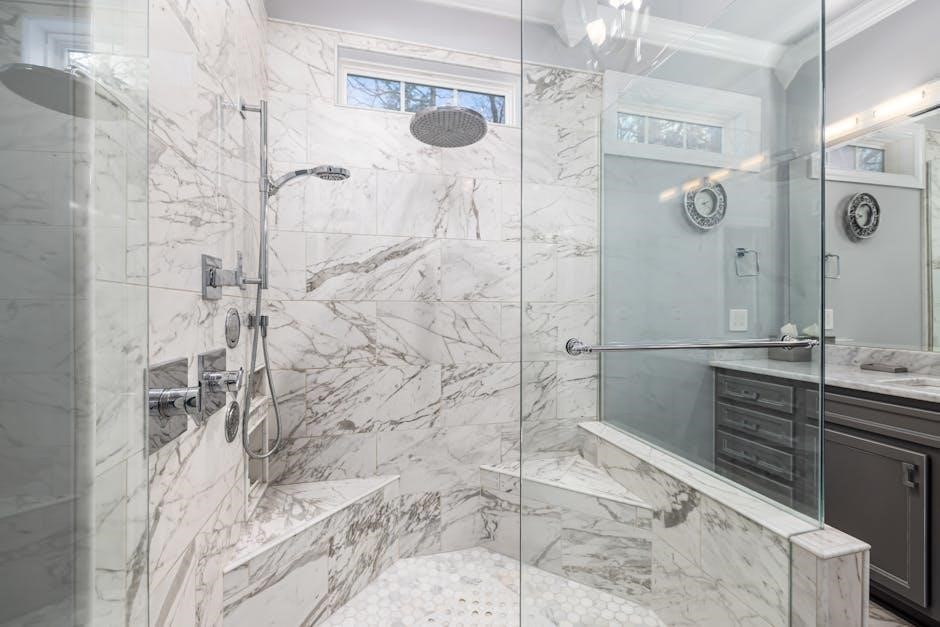
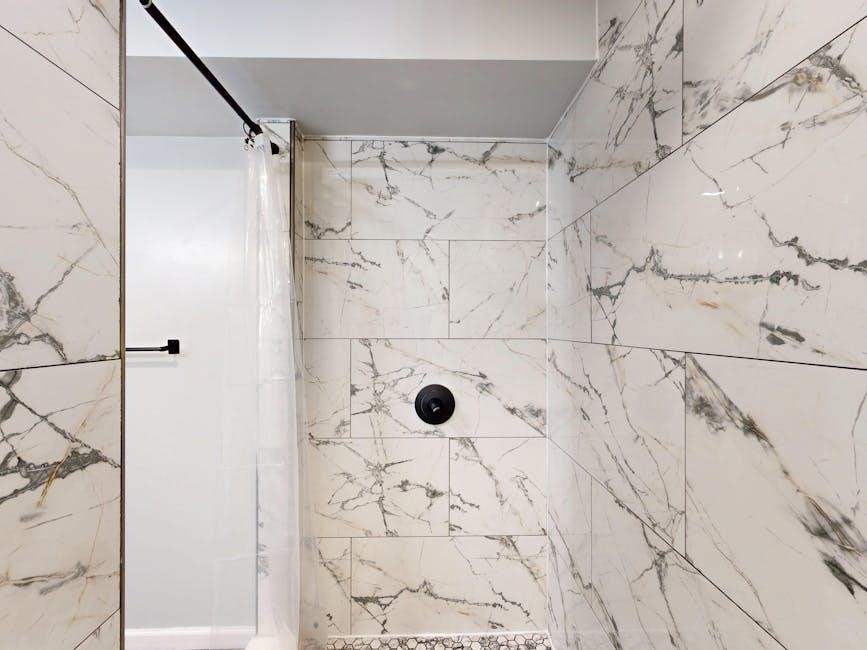
Removing Existing Kohler Shower Valve Trim
Begin by carefully removing the two screws securing the shower valve trim plate․ Note that some models may not have a collar present; proceed regardless․ Be prepared to address any silicone sealant used during the original installation․ A razor blade, carefully applied around the trim plate’s exterior, will effectively break the silicone bond․
The shower arm itself screws into a drop ear 90-degree fitting and can be unscrewed․ The escutcheon surrounding the shower arm is typically secured similarly to the trim plate, often with silicone․ Gently work a razor blade around its perimeter to release it․ Remember accessibility is key; these components are designed for removal․
Removing Screws and Collars
The initial step involves locating and removing the two screws that fasten the shower valve trim․ These screws are typically visible on the trim plate, holding it securely against the wall․ Once the screws are removed, attempt to gently pull the trim plate away from the wall․
A collar may or may not be present, depending on the specific Kohler valve model․ If a collar exists, it sits between the trim plate and the valve body․ Carefully remove it after the screws are out․ Be mindful of potential corrosion or buildup that might make removal slightly difficult․ Patience is key to avoid damaging the valve components․
Dealing with Silicone Sealant
Often, a small bead of silicone sealant is applied around the shower valve trim plate during installation to create a watertight seal․ This sealant can make removing the trim plate challenging․ To address this, carefully use a razor blade to gently break the seal around the perimeter of the trim plate․
Work slowly and cautiously to avoid scratching the surrounding tile or damaging the valve itself․ Once the silicone is breached, the trim plate should become easier to remove․ Be prepared for some resistance, and avoid forceful pulling, which could damage the valve body or plumbing connections․ A little patience will prevent unnecessary complications․
Installing the New Kohler Shower Valve
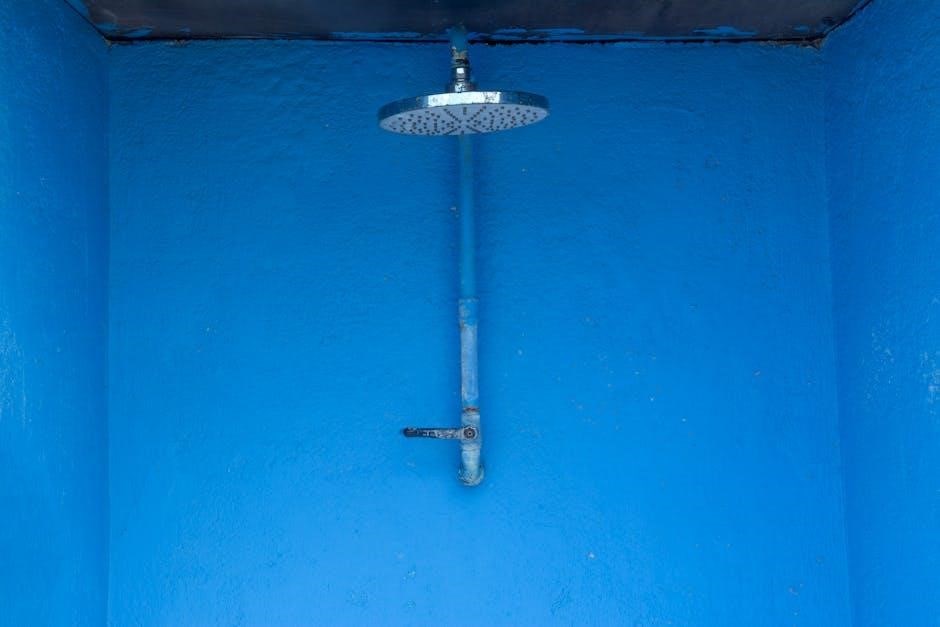
Proper positioning is crucial for comfortable shower use․ Install the Kohler shower valve approximately 48 to 52 inches (122-132 cm) from the finished floor․ This height ensures easy access and operation for most users․

For transfer valves, which control handheld showers, a slightly lower installation height of 42 to 48 inches (107-122 cm) is recommended․ This adjustment allows for convenient reach and prevents awkward positioning․ Ensure the valve is securely mounted and aligned before proceeding with trim installation․ Double-check all connections for tightness and proper function․
Positioning the Valve: Optimal Height (48-52 inches)
Achieving the ideal shower experience hinges on correct valve placement․ Kohler recommends installing the shower valve between 48 and 52 inches from the finished floor․ This standard height caters to a broad range of users, providing comfortable and accessible operation․ Precise measurement is key; deviations can impact usability․
Consider user preferences and bathroom layout during installation․ While 48-52 inches is optimal, slight adjustments may be necessary based on individual needs․ Ensure sufficient clearance around the valve for easy grip and turning․ Proper positioning minimizes strain and maximizes shower enjoyment․ A well-placed valve enhances the overall showering experience․
Transfer Valve Installation Height (42-48 inches)
For handheld shower functionality, the transfer valve requires specific height considerations․ Kohler advises positioning this valve between 42 and 48 inches from the finished floor․ This lower placement ensures comfortable access and operation of the handheld showerhead, catering to diverse user preferences and showering styles․
Strategic placement is crucial for a seamless showering experience․ The reduced height allows for easy switching between the main showerhead and the handheld option․ Consider the arc of the handheld hose when determining the exact height within the recommended range․ Proper installation enhances convenience and usability, making the handheld shower a practical addition․
Mixer Cap Replacement (GP77759)
When replacing the mixer cap (GP77759), a crucial step involves ensuring a proper seal and secure fit․ Begin by carefully removing the existing cap, noting its orientation․ If a metal collar is present, utilize it with the new mixer cap to facilitate a watertight connection․ This collar is often included with replacement kits and is vital for preventing leaks;
Inspect the valve body for any debris or corrosion before installing the new cap․ Gently screw the mixer cap into place, avoiding over-tightening, which could damage the valve․ A snug fit is sufficient to maintain pressure and prevent water from escaping․ Proper installation of the mixer cap is essential for consistent temperature control․
Pressure Balancing Unit (PBU) Replacement (GP500520)
Replacing the Pressure Balancing Unit (PBU) (GP500520) is vital for maintaining consistent water temperature and preventing scalding․ Begin by carefully removing the old PBU, observing its position and orientation within the valve body․ Inspect the valve body for any mineral buildup or damage that could affect the new PBU’s performance․
Install the new PBU, ensuring it’s correctly seated and aligned․ Proper alignment is crucial for the unit to function effectively․ Gently tighten any securing components, avoiding excessive force․ After installation, test the shower valve to confirm the PBU is balancing pressure and maintaining a stable temperature․ A properly functioning PBU ensures a safe and comfortable showering experience․
Mixer Cap & PBU Kit Installation (GP76851)
The GP76851 kit conveniently combines both the mixer cap and the Pressure Balancing Unit (PBU) for a comprehensive upgrade․ Begin by removing the existing mixer cap and PBU, noting their original positions․ This kit simplifies the process, ensuring compatibility between the components․
Install the new PBU first, ensuring correct seating and alignment within the valve body․ Then, attach the new mixer cap, securing it firmly but gently․ After installation, thoroughly test the shower valve, checking for consistent temperature and pressure․ This kit provides a reliable solution for restoring optimal performance and preventing leaks, offering a streamlined repair process․
Troubleshooting Common Installation Issues
Leaky valve connections are often caused by improperly tightened fittings or worn-out O-rings; Ensure all connections are snug, but avoid over-tightening, which can damage the valve body․ Inspect and replace any damaged O-rings or seals․ Low water pressure can stem from debris obstructing the valve or partially closed shut-off valves․
Flush the valve to remove any sediment․ Verify that the main water supply and shut-off valves are fully open․ If issues persist, check for kinks in the water supply lines․ Addressing these common problems promptly will restore your Kohler shower valve to optimal functionality, ensuring a consistent and enjoyable showering experience․
Leaky Valve Connections
Persistent leaks around valve connections typically indicate either insufficient tightening or compromised sealing components․ Begin by carefully tightening all fittings, but exercise caution to avoid over-tightening, which can fracture the valve body or strip threads․ If tightening doesn’t resolve the issue, inspect O-rings and seals for cracks, tears, or deformation․
Replace any damaged seals with genuine Kohler replacement parts․ A small bead of silicone sealant can be applied during reassembly to enhance the watertight seal, particularly around the escutcheon plate․ Ensure the sealant is compatible with plumbing fixtures․ Addressing these leaks promptly prevents water damage and maintains efficient operation․
Low Water Pressure
Reduced water flow from your Kohler shower can stem from several causes․ First, check the main water supply to ensure adequate pressure throughout the house․ If pressure is sufficient elsewhere, the issue likely resides within the valve itself․ Inspect the pressure balancing unit (PBU) – GP500520 – for mineral buildup or debris obstruction․
A clogged PBU restricts water flow․ Remove and thoroughly clean or replace the unit․ Also, examine the showerhead for mineral deposits; soaking it in vinegar can dissolve buildup․ Finally, verify that supply lines aren’t kinked or partially closed․ Addressing these points should restore optimal water pressure․
Kohler Company History & Support
Founded in 1873 by John Michael Kohler, an Austrian immigrant, Kohler Co․ began as a foundry producing cast-iron and steel products in Wisconsin․ From humble beginnings with an enameled hog scalder, Kohler evolved into a global leader in kitchen and bath products․ A legacy of innovation and quality defines the company’s nearly 150-year history․
For assistance with your Kohler shower valve installation or any product concerns, Kohler provides comprehensive customer support․ Contact your local authorized Kohler distributor or reach the Customer Service Department directly at 001-800-456-4537, Monday through Friday, 8:00 a․m․ to 5:00 p․m․ (CST)․ Kohler is dedicated to ensuring customer satisfaction․
A Brief Kohler Timeline (Since 1873)
1873: John Michael Kohler purchases a foundry in Wisconsin, initiating the company’s journey․ Early production focused on cast-iron farm implements and architectural ironwork․ Early 20th Century: Kohler pioneers enameled iron bathtubs, revolutionizing bathroom fixtures and establishing a commitment to innovation․ The company expands its product line to include toilets and sinks․
Mid-20th Century: Kohler introduces color to bathrooms, breaking from traditional white and offering greater design flexibility․ Continued expansion into hospitality and commercial markets․ Late 20th/Early 21st Century: Kohler diversifies into engines, generators, and global design centers, solidifying its position as a multi-industry leader․ Hundreds of interesting facts document Kohler’s impressive growth․
Contacting Kohler Customer Service (001-800-456-4537)
For assistance with your Kohler shower valve installation or any product-related inquiries, Kohler’s dedicated customer service team is readily available․ Reach them directly at 001-800-456-4537 during business hours, Monday through Friday, from 8:00 a․m․ to 5:00 p․m․ Central Standard Time (CST)․
Before contacting support, it’s helpful to have your model number and purchase date readily available․ For project specifications or assistance with larger installations, consider reaching out to your authorized local Kohler distributor․ They can provide tailored guidance and support․ Kohler is committed to ensuring a seamless experience with their products․
Escutcheon and Shower Arm Removal
Before tackling the valve itself, removing the escutcheon and shower arm provides clearer access․ The trim plate surrounding the showerhead often has a silicone bead; carefully use a razor blade to break this seal around the perimeter․ The shower arm itself screws into a drop ear elbow – simply unscrew it․
The escutcheon around the shower arm mirrors the trim plate removal process, likely also sealed with silicone․ Gently work a razor blade around the edge to release it․ Remember to exercise caution when using blades to avoid damaging surrounding surfaces․ These components are designed for accessibility, making removal relatively straightforward with the right approach․
Resources: Kohler Valve Guides & Documentation (NU-030, K-7507)
Kohler provides comprehensive resources to aid in installation and understanding of their valve systems․ The NU-030 Shower Valve Installation Guide, spanning 15 pages, offers detailed step-by-step instructions and diagrams for various models․ This guide is invaluable for visualizing the process and ensuring correct connections․
Additionally, the Kohler Thermostatic Mixing Valve Guide (8 pages) provides specific information on thermostatic valve functionality and maintenance․ For kitchen applications, the Kohler K-7507 Kitchen documentation offers relevant insights․ Accessing these guides, alongside sales invoice templates, empowers users with the knowledge needed for successful installations and repairs․
Post-Installation Testing & Checks
Following installation, thorough testing is crucial to verify proper functionality and prevent future issues․ Begin by slowly restoring the water supply, carefully inspecting all connections – including the valve itself and surrounding pipes – for any signs of leaks․ Operate the shower valve through its full range of temperature and flow settings, confirming smooth operation and accurate temperature control․
Check for consistent water pressure across both hot and cold settings․ Ensure the pressure balancing unit (PBU) is functioning correctly, maintaining a stable temperature even with fluctuations in water supply․ Address any leaks or inconsistencies immediately to avoid potential water damage and ensure a safe, enjoyable showering experience․