Canon EOS 350D Manual: A Comprehensive Guide
This manual provides detailed instructions for the Canon EOS 350D, covering features, setup, shooting modes, and troubleshooting, ensuring optimal photographic experiences.
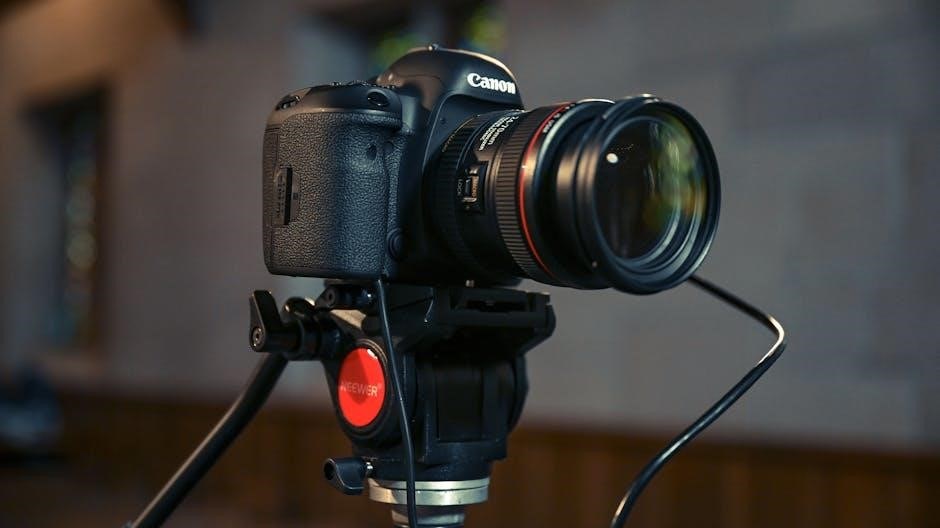
The Canon EOS 350D, a significant upgrade from the 300D, marked a pivotal moment in accessible digital SLR photography. Released to broaden the appeal of DSLR technology, this camera boasts an 8.0-megapixel sensor and enhanced performance.
This guide serves as a comprehensive resource, designed to unlock the full potential of your EOS 350D. Whether you’re a beginner or an experienced photographer, this manual will navigate you through its features, ensuring stunning image quality and creative control. It’s a leap forward!
Key Features and Specifications
The Canon EOS 350D features an 8.0-megapixel CMOS sensor, delivering detailed images. It offers a DIGIC II image processor for fast operation and excellent color reproduction. The camera supports shooting at up to 3 frames per second, with a 9-point autofocus system for sharp results.
Key specs include a 1.8-inch LCD screen, compatibility with EF and EF-S lenses, and RAW/JPEG recording options. Its compact size and user-friendly interface make it ideal for both beginners and enthusiasts.
Unboxing and Initial Setup
Upon unboxing your Canon EOS 350D, you’ll find the camera body, a kit lens (typically 18-55mm), battery, charger, strap, and various manuals. Begin by inserting the battery and a compatible memory card. Power on the camera and follow the on-screen prompts to set the language, date, and time.
Ensure the lens is securely attached before proceeding. Familiarize yourself with the basic controls and menu navigation to prepare for your first photoshoot.

Understanding the Camera Body
The Canon EOS 350D features a robust, yet compact body designed for comfortable handling. Key areas include the mode dial, shutter button, and control dials for adjusting settings. The rear panel houses the LCD screen for image review and menu navigation.
Pay attention to the placement of buttons for quick access to essential functions. Understanding the physical layout is crucial for efficient operation and capturing stunning images.
Buttons and Dials Explained
The EOS 350D’s main dial selects shooting modes (Auto, Program, Aperture Priority, Shutter Priority, Manual). The cross keys navigate menus and adjust settings on the LCD. The ‘Set’ button confirms selections. The AF point selection/Drive mode button controls focus and shooting speed.
The Quick Control button provides direct access to frequently used settings. Familiarizing yourself with each button’s function streamlines your workflow and enhances creative control.
Viewfinder and LCD Screen
The optical viewfinder offers a 95% coverage of the scene, displaying shooting information like focus points and exposure settings. The 2.0-inch LCD screen facilitates image review, menu navigation, and Live View functionality (though limited compared to later models).
Brightness adjustment is crucial for clear visibility in varying lighting conditions. Utilize the LCD for precise image assessment and detailed settings adjustments.
Menus and Settings Navigation
The Canon EOS 350D features a user-friendly menu system accessed via the ‘MENU’ button; Settings are organized into distinct tabs: Shooting, Playback, Setup. Navigate using the directional buttons and set selections with the ‘SET’ button.
Familiarize yourself with the menu structure to customize camera functions, adjust image quality, and manage various operational preferences for a tailored shooting experience;
Shooting Menu Options
Within the Shooting Menu, you’ll find crucial settings like Image Quality (RAW/JPEG), Picture Style, and White Balance. Adjust the AF operation mode, metering mode, and drive mode for varied shooting scenarios. Explore options for auto exposure, flash control, and custom functions to refine your photographic approach.
These settings directly impact image capture, allowing precise control over the final result.
Setup Menu Options
The Setup Menu governs essential camera functions beyond shooting itself. Here, you’ll configure date/time, display settings (LCD brightness, viewfinder display), and button customization. Manage auto power off timers, sensor cleaning, and file naming conventions. Crucially, this menu handles firmware updates and sensor cleaning options.

Proper setup ensures a personalized and efficient user experience with your EOS 350D.
Focusing Modes and Techniques
The Canon EOS 350D offers versatile focusing options. Utilize One-Shot for static subjects, predicting focus lock. AI Servo excels with moving subjects, continuously tracking focus. Manual Focus provides precise control when autofocus struggles. Mastering autofocus point selection is key; choose points strategically for sharp results.
Experiment with these modes to achieve consistently focused images in diverse shooting scenarios.
Autofocus Point Selection
The EOS 350D features nine autofocus points, selectable via the camera’s controls. Choosing the correct point is crucial for sharp images. Single-point AF allows precise selection, ideal for stationary subjects. Automatic AF point selection lets the camera decide, suitable for general use.
Consider your subject’s position and movement when selecting a point for optimal focus accuracy. Experiment to find what works best!
Manual Focusing
Switching to manual focus on the Canon EOS 350D allows complete control over the focusing process. Use the focusing ring on your lens, observing the image on the LCD screen or through the viewfinder. Zooming in on the LCD aids precise adjustments.

Manual focus is beneficial in low light or when autofocus struggles. Practice makes perfect – refine your technique for consistently sharp results!
Exposure Control: Aperture, Shutter Speed, and ISO
Mastering exposure is crucial for photography. The Canon EOS 350D allows control over aperture (lens opening), shutter speed (exposure duration), and ISO (sensor sensitivity). These elements work together to determine image brightness.
Adjusting these settings creatively impacts depth of field, motion blur, and image noise. Experiment with different combinations to achieve desired photographic effects and understand their interplay.
Aperture Priority Mode (Av)
Aperture Priority (Av) mode on the Canon EOS 350D lets you select the lens aperture (f-stop), while the camera automatically sets the shutter speed for proper exposure. This is ideal for controlling depth of field – a smaller f-number creates shallow depth, blurring backgrounds.
Av mode is excellent for portraits and isolating subjects. Remember to monitor the shutter speed to avoid motion blur, especially in low light. It offers creative control with simplified operation.
Shutter Priority Mode (Tv)
Shutter Priority (Tv) mode on the Canon EOS 350D allows you to choose the shutter speed, while the camera adjusts the aperture for correct exposure. This mode is perfect for capturing motion – fast shutter speeds freeze action, while slower speeds create motion blur.
Use Tv mode for sports or waterfalls. Be mindful of the resulting aperture; a narrow aperture (high f-number) may reduce light and increase noise. It’s a powerful tool for dynamic photography.
Manual Mode (M)
Manual (M) mode grants complete control over both aperture and shutter speed on your Canon EOS 350D. This mode is ideal for challenging lighting situations or when you desire precise creative control over depth of field and motion blur.
Use the camera’s light meter as a guide, adjusting settings until proper exposure is achieved. Mastering M mode requires practice, but unlocks full photographic potential.
Image Quality and File Formats
The Canon EOS 350D offers choices in image quality and file formats, impacting file size and editing flexibility. RAW captures all sensor data, providing maximum editing latitude, while JPEG offers smaller file sizes and convenience.
Select image size (Large, Medium, Small) and compression levels based on your needs. Higher resolution and lower compression yield larger, more detailed images.
RAW vs. JPEG
RAW files from the EOS 350D retain all image data captured by the sensor, offering extensive post-processing flexibility for adjustments to white balance, exposure, and more. JPEG files are compressed, losing some data for smaller file sizes and immediate usability.
Choose RAW for critical shots needing maximum editing control, and JPEG for everyday photos where convenience is prioritized. Consider your workflow and editing intentions.
Image Size and Compression
The EOS 350D allows selecting various image sizes, impacting file resolution and print quality. Larger sizes (e.g., 8 megapixels) provide more detail, ideal for large prints or cropping. Compression levels affect file size; higher compression reduces size but may introduce artifacts.
Balance desired image quality with storage capacity. Lower compression maintains detail, while higher compression saves space. Experiment to find the optimal setting for your needs.
Using Lenses with the EOS 350D
The Canon EOS 350D is compatible with both EF and EF-S lenses, offering a wide range of options for various photographic styles. EF lenses are designed for full-frame cameras, while EF-S lenses are optimized for APS-C sensors like the 350D’s.
Ensure lens compatibility before purchase. Using compatible lenses guarantees optimal image quality and camera functionality. Explore different focal lengths and apertures to achieve desired effects.
EF and EF-S Lenses
EF lenses, Canon’s original autofocus lens mount, work seamlessly with the EOS 350D, offering a broad selection of professional-grade optics. EF-S lenses, designed specifically for APS-C sensor cameras like the 350D, are lighter and more compact, providing excellent performance at a more affordable price point.
EF-S lenses have a red dot marking, distinguishing them from EF lenses. Both lens types deliver exceptional image quality, expanding creative possibilities.
Lens Compatibility
The Canon EOS 350D boasts excellent lens compatibility, supporting the entire range of Canon EF and EF-S lenses. Older EF lenses, even those designed for film cameras, will function effectively, though some features might be limited. Utilizing EF-S lenses maximizes the camera’s APS-C sensor capabilities.
Ensure lenses are securely mounted and properly communicate with the camera body for optimal autofocus and exposure control. Adapters may allow for using non-Canon lenses, but compatibility isn’t guaranteed.
Flash Photography
The Canon EOS 350D features a built-in flash for convenient illumination in low-light conditions. Explore various built-in flash settings, including auto, manual, and red-eye reduction. For more advanced control, consider utilizing external flash units, compatible with the camera’s hot shoe.
External flashes offer greater power, flexibility, and creative lighting options. Understand flash synchronization speed to avoid dark bands in images.

Built-in Flash Features
The EOS 350D’s integrated flash offers several modes: Auto, Manual, Red-Eye Reduction, and Flash On/Off. Auto mode lets the camera determine flash usage. Manual allows you to control flash output. Red-Eye Reduction emits pre-flashes to minimize red-eye effect.
Flash Exposure Compensation adjusts flash intensity. Explore High-Speed Sync for faster shutter speeds with flash. Understand the flash range for optimal results in various lighting scenarios.
External Flash Units
The Canon EOS 350D supports various external flash units via the hot shoe, offering greater power and control. Compatible Speedlites enable TTL (Through-The-Lens) flash metering for accurate exposures. Explore features like bounce flash for softer lighting and remote flash control.
Utilize the flash bracketing function to capture a series of images with varying flash exposures. Understand the benefits of using off-camera flash for creative lighting setups and advanced photography.
Shooting Modes: Scene Modes and Custom Modes
The Canon EOS 350D offers a range of pre-set Scene Modes like Portrait, Landscape, Close-up, and Sports, optimizing settings for specific situations. These simplify photography for beginners.
Beyond these, explore Custom Modes (C1 and C2) to save personalized settings for frequently used shooting scenarios. This allows quick access to your preferred configurations, enhancing workflow and creative control. Experiment to find what works best!
Portrait Mode
Portrait Mode on the Canon EOS 350D prioritizes capturing subjects with a blurred background, enhancing focus on the person. It achieves this by utilizing a wider aperture, creating a shallow depth of field.
The camera automatically adjusts settings for pleasing skin tones and softens details. This mode is ideal for headshots and portraits where isolating the subject is key. Remember to ensure good lighting for optimal results!
Landscape Mode
Landscape Mode on the Canon EOS 350D is designed for capturing expansive scenes with sharp detail from foreground to background. The camera selects a smaller aperture, maximizing depth of field to ensure everything is in focus.
It also optimizes color and contrast for vibrant, natural-looking landscapes. This mode is best used with ample light and a stable shooting position, potentially utilizing a tripod for maximum clarity.
White Balance Settings
White Balance adjusts colors so they appear natural, regardless of lighting conditions. The Canon EOS 350D offers preset options like Daylight, Cloudy, Tungsten, and Fluorescent for common scenarios.
Custom White Balance allows precise adjustment by referencing a white or gray card. Accurate white balance ensures true-to-life colors in your photos, avoiding unwanted color casts. Experimenting with settings is key to achieving desired results.
Preset White Balance Options
The EOS 350D features several convenient preset white balance options. Daylight is ideal for sunny conditions, while Cloudy warms images on overcast days. Tungsten corrects the orange cast of indoor lights, and Fluorescent handles cooler fluorescent lighting.
Additionally, there are Shade and Flash presets. These presets offer quick and easy color correction, simplifying shooting in various environments without manual adjustments.
Custom White Balance
For precise color accuracy, the Canon EOS 350D allows custom white balance setting. Point the camera at a white or gray card under the current lighting conditions and follow the camera’s menu prompts. This captures a reference color.
The camera then uses this reference to neutralize color casts, ensuring true-to-life colors in your images. Custom white balance is invaluable for challenging or mixed lighting scenarios.
Picture Styles
Canon’s Picture Styles offer pre-set image processing options, influencing contrast, sharpness, and color tone. Available styles include Standard, Portrait, Neutral, Faithful, and Monochrome, each tailored for specific subjects or artistic effects.
Users can customize these styles, adjusting parameters like sharpness, contrast, color saturation, and tone. This allows photographers to achieve their desired look directly in-camera, reducing post-processing needs and fostering creative control.
Standard, Portrait, Neutral, Faithful, Monochrome
Standard delivers well-balanced images suitable for general photography. Portrait emphasizes skin tones for flattering results. Neutral provides a flatter profile, ideal for post-processing. Faithful prioritizes accurate color reproduction, mirroring the scene as perceived.
Monochrome creates striking black and white images directly in-camera. Each style offers a distinct aesthetic, allowing photographers to quickly select a look matching their creative vision and subject matter.
Customizing Picture Styles
Canon’s Picture Styles are fully customizable, allowing photographers to fine-tune sharpness, contrast, color saturation, and tone effects. Adjust these settings individually to create a personalized look for your images. Save your custom styles for consistent results across shoots.
Experiment with different combinations to achieve unique aesthetics. This level of control ensures images reflect your artistic intent, going beyond the preset options for truly tailored photography.
Reviewing and Deleting Images
The playback mode on the EOS 350D allows for easy image review. Use the zoom button to inspect details and the directional pad to navigate. Protect important images from accidental deletion using the image protection feature.
Deleting unwanted photos is straightforward, but exercise caution! Confirm deletion prompts to avoid losing valuable shots. Regularly reviewing and culling images optimizes card space and streamlines your workflow.
Playback Mode
Entering playback mode is achieved by pressing the playback button on the Canon EOS 350D. This allows you to review captured images directly on the LCD screen. Utilize the zoom control for detailed inspection of sharpness and composition.
Navigation between images is simple using the directional buttons. Single image view or multi-image index display options are available. Rotate images for comfortable viewing and assess histogram data for exposure accuracy.
Image Protection
Protecting images on the Canon EOS 350D prevents accidental deletion. Select individual images or all images on the card for protection via the playback menu. A key icon will appear on protected photos.
To unprotect, repeat the process, deselecting the protection option. This feature is crucial when traveling or handling the memory card on different devices, safeguarding your valuable photographs from unintentional loss.
Transferring Images to a Computer
Transferring images from your Canon EOS 350D is straightforward. Utilize a compatible card reader for fast and efficient data transfer, directly accessing the memory card’s files. Alternatively, connect the camera to your computer using a USB cable.
The camera will appear as a removable drive. Copy and paste the desired images to your computer. Ensure proper drivers are installed for optimal connection and transfer speeds.
Using a Card Reader
A card reader offers a swift method for transferring images from your EOS 350D’s memory card to a computer. Simply insert the card into the reader, then connect the reader to a USB port on your computer.
The card will appear as a removable drive, allowing you to easily copy and paste your photos. This method is generally faster than a direct USB connection and minimizes camera battery drain.
Direct USB Connection
Connecting your Canon EOS 350D directly to a computer via a USB cable allows for image transfer and potential remote control capabilities. Ensure the camera is powered off before connecting.
Once connected, power on the camera and select ‘PC Connect’ in the camera’s menu. Your computer should recognize the camera as a storage device, enabling file transfer. This method also charges the camera battery.
Troubleshooting Common Issues
Encountering problems with your Canon EOS 350D? This section addresses frequent issues. Common error messages will be explained, alongside solutions. If the camera fails to power on, check the battery and connections.
For card errors, try reformatting the card in the camera. Refer to the full manual for detailed troubleshooting steps and Canon’s support resources for further assistance.
Error Messages
The Canon EOS 350D displays error codes to indicate specific problems. “Err 99” often signals a shutter issue, requiring professional repair. Card errors (like “Card Full” or “No Card”) need attention – check the card or reformat it.
Consult the complete manual for a comprehensive list of error messages and their corresponding solutions. Ignoring these messages can lead to further camera malfunction.
Camera Not Turning On
If your Canon EOS 350D fails to power on, first check the battery. Ensure it’s fully charged and correctly inserted. Inspect the battery contacts for any dirt or damage. Try a different, known-good battery if available.
Also, verify the power mode dial is not set to “OFF.” If issues persist, a professional camera repair might be necessary to diagnose internal problems.
Firmware Updates
Regular firmware updates enhance the Canon EOS 350D’s performance and compatibility. Visit the Canon support website to check for the latest version. Download the firmware and follow the provided instructions carefully for transferring it to your camera’s CompactFlash card.
Ensure sufficient battery charge during the update process to prevent interruption. Incorrectly performed updates can render the camera unusable, so proceed with caution.
Cleaning and Maintenance
Proper cleaning ensures longevity for your Canon EOS 350D. Use a blower to remove dust from the sensor and a soft brush for the camera body. Avoid liquids directly on the camera; instead, dampen a microfiber cloth.
Regularly clean the lens with lens paper. Store the camera in a dry, dust-free environment when not in use. Avoid extreme temperatures and humidity.
Canon EOS 350D vs. EOS 300D: A Comparison
The Canon EOS 350D builds upon the foundation of the 300D, offering key improvements. Notably, the 350D boasts 8 megapixels versus the 300D’s 6.3, resulting in more detailed images. It features a more refined body design and enhanced responsiveness.
Unlike the 300D, the 350D isn’t firmware-disabled, addressing prior limitations. Both cameras remain excellent entry points into DSLR photography, but the 350D provides a noticeable upgrade;

Resources and Further Learning
Expand your Canon EOS 350D knowledge with readily available resources. Explore comprehensive manuals for models like the PowerShot G11, EOS 30D, 40D, 5D, 50D, and 60D for comparative insights. Online forums and photography communities offer valuable tips and troubleshooting assistance.
Utilize Canon’s official website for firmware updates and support. Consider exploring logic puzzle games like ‘Draw To Smash’ to sharpen your problem-solving skills – a useful trait for photography!